
Hello everyone
Todays project is a card made using the lovely Painted Poppies stamp set.
I was so very pleased when I saw this stamp set as I knew I could use it for lots of projects.
The stamp set as it's name says is all about Poppies.
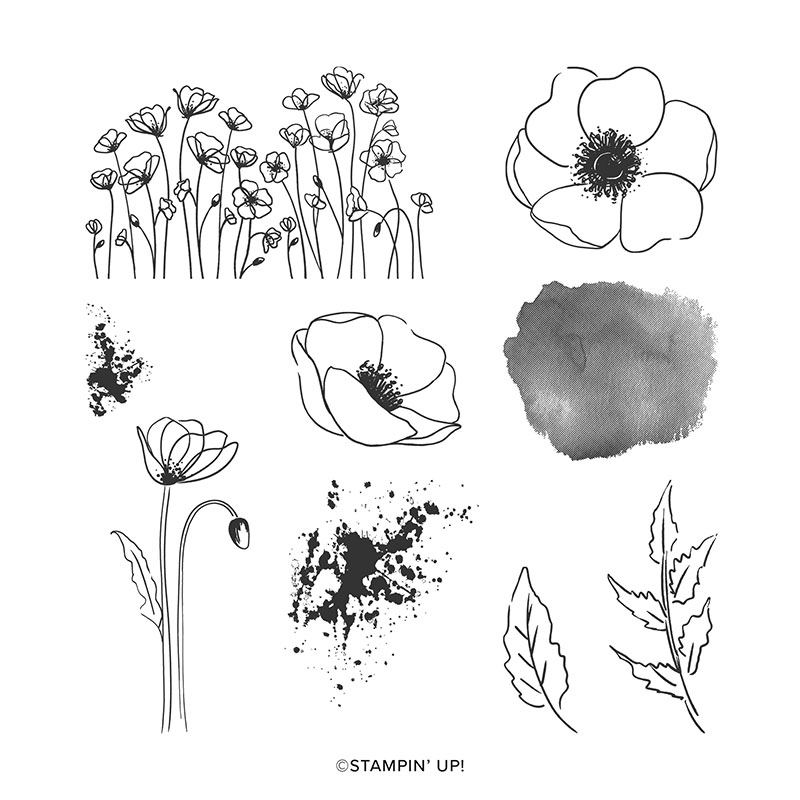
This stamp set is part of a whole Poppy related suite. There are dies and a great set of Sentiments. I used that for the sentiment on the card.
For this card, I wanted to try out a different colour... usually we see Red Poppies don't we?...There is a variety that is Blue too.. so I thought I would make a card using Blue too. So here we go, the main colour of this card is........ Pacific Point.. Blue!
Here is the card I made.

These are the measurements of the card used:
Whisper White card: cut in half (4 1/8") on short side, turn and score in half (5 7/8") on long side
Pacfic Point card: 2 1/2" x 5 3/4", scap to punch shapes
Whisper White card: 3 3/4" x 5 1/2", 2" x 5 3/4", scrap to punch shape
To create this card:
Fold and burnish the Whisper White card to make an A6 card base
Using the Lovely me Fancy punch, punch 1 Whsper White shape and 2 Pacific Point shapes
With Pacific Point stamp the big blotches over the larger Whisper White card piece to create a background
With the Sponge Brayer add Pacific Point to the Whisper White Strip, starting at the top and moving down to get an ombre look
Tip: roll sponge brayer in one direction, lifting and repeating into ink, be gentle... it may not look like you have any ink, but try it and you will see you have. Apply to card starting off the card peice and roll gently back and forth
With Memento Black ink stamp the poppy flower over the brayered coloured card piece
With Memento Black stamp the sentiment onto the Label me Lovely punched shape. Stamp blotches using Seaside spray around the edges.
Add the 2 Pacific Point shapes to the back of the Whisper White piece, leaving a border showing
Add the 2 Pacific Point shapes to the back of the Whisper White piece, leaving a border showing
Add a piece of Seaside Spray Linen Ribbon to the left hand side of the Pacific Point card piece.
Tip: Add Tear and tape to the ribbon then add to the back of the card, leaving an edge peeping out
Adhere all layers using Liquid Glue and add the sentiment topper using dimensionals to complete the card
Here are the cards made by the ladies at Stamp n Sip.

Thank you for visiting today
Happy Crafting!
Wendy
If you would like to recreate this card, these are the supplies I used:
Product List

")


 Scalloped Linen Ribbon")


Another lovely card.
ReplyDeleteThank you Val x
Delete